Hi Everyone - By the time you read this I will be in London attending a Study Day for work, so I have my fingers crossed that the weather will be milder than it has been as I really do not fancy sitting all day in a stuffy room when the sun is shining outside.
Today I am continuing with my spotlight on the stamp set Marry Me.
I promised I would show you a way of using this lovely set other than for wedding/Engagement cards & here is what I came up with:
I have added a couple of stamps from some other sets – the words & the foliage at the top of the card are from the set called Charming, which you can also find in the mini & I have also added some extra foliage beneath the poppies from the stamp set called Pocket Silhouettes which you can find in the main catalogue. Let me know what you think.
Supplies
Stamps: Marry Me (c122003, w121929), Pocket Silhouettes (111672), Charming (w116519, c125829)
Card: Whisper White, More Mustard
Inks: Pool Party, Tempting Turquoise, Sahara Sand, Crumb Cake, So Saffron, Basic Gray
A World of Stamp & Inks
Independant Stampin Up Demonstrator for Norfolk
Stampin Up Experience Days
Here are the dates for 2012 Experience days that Lisa & myself have organised.
Now Booking
Sunday 29th April - £25 for a whole day of cardmaking or scrapbooking or a mix of both - the Choice is yours.
Future Dates:
Sunday24th June,
Saturday 6th October
Saturday1st December ~ Christmas gift event
And don't forget for every event you attend you will receive a FREE raffle ticket which could win you a BIG SHOT BUNDLE.
(Draw to take place during December's Event)
All DAYS HAVE VERY LIMITED PLACES SO BOOK NOW TO AVOID DISAPPOINTMENT.
Please note due to problems in the past we now need payment on booking & as before there will be no refunds without 48hrs notice.
Wednesday, 28 March 2012
Monday, 26 March 2012
Day 2 Mini Spotlight–Marry Me
Hi Everyone hope you are all keeping well.
I am loving the weather so much at the moment & guess who is on holiday this week? YIPEE.
So because today was so glorious, instead of staying in doors & doing my blog post I’m afraid I made the most of it & spent the day pootling in the garden so I hope you can forgive me.
Today I will continue my spotlight on the mini catalogue & concentrate this weeks posts to the stamp set called Marry Me (w121929 c122003) a beautiful set consisting of 6 lovely stamps that are perfect for weddings but can also be used at other times as I will show you in the next couple of days.
When I first saw this set I pictured this card in my head & I’m so pleased with how it has turned out. I used Whisper White to stamp on but prior to stamping the happy couple I made the arch out of scrap paper & then used my ink pads to add the colour of the church to the card before using Daffodil Delight & More Mustard to make the archway the couple are standing in.
I wanted the couple to stand out even more so I used Black embossing powder to give them a wonderful sheen & some Dazzling Diamond added to the veil added that all important bling.
I wanted the greeting to appear in a heart but unfortunately I could not get one to fit, so I used one of the hearts out of the Timeless type junior alphabet die as a template & then just increased its size slightly when I came to cut it around the words – Perfect.
Card: So Saffron, Basic Black, Whisper White
Misc. : Timeless Junior Alphabet die, Dazzling Diamonds glitter.
I am loving the weather so much at the moment & guess who is on holiday this week? YIPEE.
So because today was so glorious, instead of staying in doors & doing my blog post I’m afraid I made the most of it & spent the day pootling in the garden so I hope you can forgive me.
Today I will continue my spotlight on the mini catalogue & concentrate this weeks posts to the stamp set called Marry Me (w121929 c122003) a beautiful set consisting of 6 lovely stamps that are perfect for weddings but can also be used at other times as I will show you in the next couple of days.
When I first saw this set I pictured this card in my head & I’m so pleased with how it has turned out. I used Whisper White to stamp on but prior to stamping the happy couple I made the arch out of scrap paper & then used my ink pads to add the colour of the church to the card before using Daffodil Delight & More Mustard to make the archway the couple are standing in.
I wanted the couple to stand out even more so I used Black embossing powder to give them a wonderful sheen & some Dazzling Diamond added to the veil added that all important bling.
I wanted the greeting to appear in a heart but unfortunately I could not get one to fit, so I used one of the hearts out of the Timeless type junior alphabet die as a template & then just increased its size slightly when I came to cut it around the words – Perfect.
Supplies
Stamps: Marry Me, Sanded (Retired)Card: So Saffron, Basic Black, Whisper White
Misc. : Timeless Junior Alphabet die, Dazzling Diamonds glitter.
Thursday, 22 March 2012
Showcasing the Mini - My Friend
Hi everyone I thought it was about time that I concentrated my efforts on the mini catalogue as you only have until the end of April to order all the goodies that we have on offer in it & if you are really quick you could still get your hands the free goodies from Sale-a-brations but this will end on the 31st March.
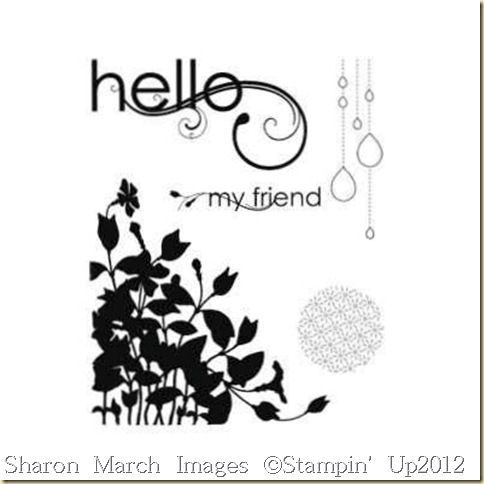
The other day as I was tidy up my craft room (a VERY rare event as those who have been brave enough to venture in will tell you) I came across my old sketch book in which I will sketch card layouts that I happen to come across. In it I found one for a set called My Friend which happens to be in the Mini.
As we have only just got this set I’m thinking it must have been somewhere in the USA whilst on holiday there last year that I saw this card but unfortunately I cannot tell you where so if you did design it then please let me know so I can give you the credit you deserve.
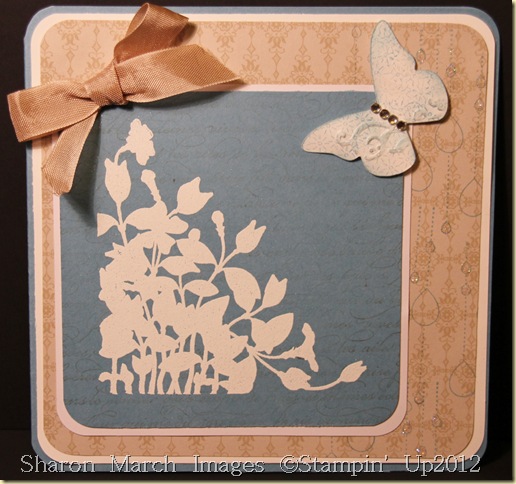
From my rough sketch this is what I came up with :
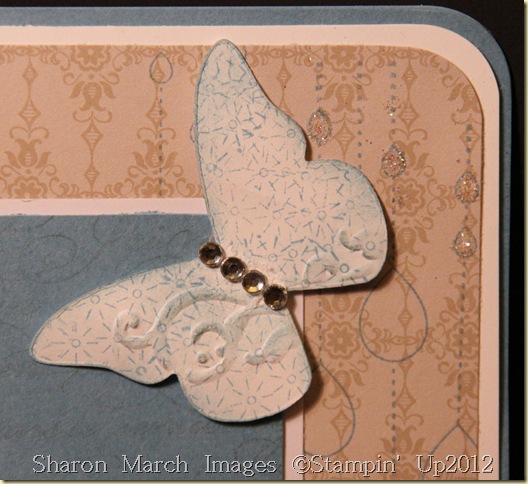
The butterfly is made using a embosslit die called Beautiful Wings but prior to cutting it I used one of the stamps from the set to add to extra details. I have also added a bit of bling to the extra stamping I did on the side of the card by using my Quickie glue pen & some Dazzling Diamonds glitter. I’m not sure how much it shows up on the photos but in real life it really adds that extra bit of twinkle.
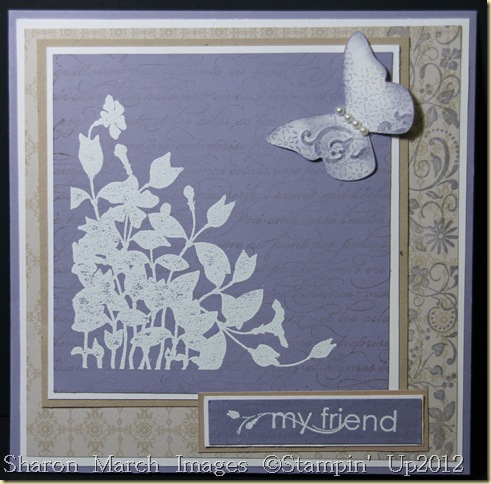
Here is another version this time using Wisteria Wonder & Crumb Cake.
I have also used my favourite wheel - Love blossom to add the extra stamping on the designer paper this time.
Supplies
Stamps: My Friend (w122585 c122587), Love Blossom wheel (123839)
Card/Ink: Marina Mist/Crumb cake or Wisteria Wonder/Crumb Cake, Whisper White
Misc.: Embosslit die Beautiful Wings (118138), Crumb Cake 1/2” Seam Binding ribbon (122332), Jewels – Rhinestones & Pearls, White Embossing powder (109132), Dazzling Diamonds glitter (102023)
Tuesday, 20 March 2012
Sail away
Hi everyone sorry for the lateness of this post but I’ve been so busy prepping for classes that I forgot all about uploading this post until just now.
Today I thought I would show a use for one of the single A La Carte stamps that is great for the men in our lifes. The stamp is called Sail Away & it costs £8.95.
I’ve used it with a brayed background & to do this successfully you need to use the glossy white card stock (106555) it just will not work so well on our whisper white card.
The sails I have stamped again & then layered up. The corners I made out 2 square punches & if you want me to show how then why not book your own party & I will demonstrate it for you.
Card:Tempting Turquoise, Pacific Point, Glossy White
Today I thought I would show a use for one of the single A La Carte stamps that is great for the men in our lifes. The stamp is called Sail Away & it costs £8.95.
I’ve used it with a brayed background & to do this successfully you need to use the glossy white card stock (106555) it just will not work so well on our whisper white card.
The sails I have stamped again & then layered up. The corners I made out 2 square punches & if you want me to show how then why not book your own party & I will demonstrate it for you.
Supplies
Stamps: Sail Away (123013)Card:Tempting Turquoise, Pacific Point, Glossy White
Thursday, 15 March 2012
Mother’s Day card
Hi Everyone I thought today I would show you my card I’ve made for my Mum for Mother’s day but I need you to promise not to let her know that you have seen it before she gets it on Sunday…
Today colour scheme is Wild Wasabi, So Saffron & just a hint of Pool Party.
I’ve used the stamp set & coordinating punch called Build a Blossom to build the main flower & the bling comes courtesy of my beloved Rhinestones. I have to give credit to my very talented downliner Veronika to thank for getting me to use this stamp set again, as it was after seeing her beautiful cards using this set I knew it would be perfect to make this card with.
The Sentiment comes from the Teeny Tiny set.
Stamps: Build a Blossom (w121923, c121994) Teeny Tiny Wishes (115370), Charming (w116519, c125829)
Punches: Blossom Petals Builder (121808), Scallop Oval (119856), Large Oval (119855), Scallop Square die (115950)
Misc.: Paper: Everyday Enchantment, Rhinestone Jewels (119246)
Today colour scheme is Wild Wasabi, So Saffron & just a hint of Pool Party.
I’ve used the stamp set & coordinating punch called Build a Blossom to build the main flower & the bling comes courtesy of my beloved Rhinestones. I have to give credit to my very talented downliner Veronika to thank for getting me to use this stamp set again, as it was after seeing her beautiful cards using this set I knew it would be perfect to make this card with.
The Sentiment comes from the Teeny Tiny set.
Supplies
Card & Inks: Whisper White, Wild Wasabi, So Saffron, Pool PartyStamps: Build a Blossom (w121923, c121994) Teeny Tiny Wishes (115370), Charming (w116519, c125829)
Punches: Blossom Petals Builder (121808), Scallop Oval (119856), Large Oval (119855), Scallop Square die (115950)
Misc.: Paper: Everyday Enchantment, Rhinestone Jewels (119246)
Tuesday, 13 March 2012
Newsprint Roses
Hi Everyone todays card has very little stamping on it which is quite a change for me but it just suited this card. My inspiration for this card came from one of my lovely ladies –Vicki Marshall who kindly demonstrated a card very similar to this one at the Hethersett Card group that I run (the original card can be found on my Craft club blog).
The roses were made using circles from the Circles # 2 die & the lovely First Edition Specialty paper.
The Greeting is from Perfect Pairs stamp set & is stamped onto a piece of Very Vanilla which was cut using the Decorative Label punch.
Card: Lucky Limeade, Basic Black, Very Vanilla
Ink: Basic Black
Paper: First Edition Specialty (121878)
Punches & Dies: Decorative Label (120907), Scallop Trim (118870), Scallop Trim Corner (118402), Circles #2 die (114526), Bird Builder (117191)
Ribbon: 1/2” Basic Black Scallop Dots
The roses were made using circles from the Circles # 2 die & the lovely First Edition Specialty paper.
The Greeting is from Perfect Pairs stamp set & is stamped onto a piece of Very Vanilla which was cut using the Decorative Label punch.
Supplies
Stamps: Perfect Pairs (w122495, c 122497)Card: Lucky Limeade, Basic Black, Very Vanilla
Ink: Basic Black
Paper: First Edition Specialty (121878)
Punches & Dies: Decorative Label (120907), Scallop Trim (118870), Scallop Trim Corner (118402), Circles #2 die (114526), Bird Builder (117191)
Ribbon: 1/2” Basic Black Scallop Dots
Saturday, 10 March 2012
Bags, Bags & more Bags
Hi Everyone, I am soooooo excited about my latest creations that I could not possibly wait until Monday to let you see them.
Here is my first one:
And NO Stampin’ Up have not produced fabric to match the Sale-a-brations Designer papers Everyday Enchantment (Although that would be lovely HINT HINT Shelli). This bag is made totally from the papers in that pack & some added extras from the In Color collection pack. And before you ask YES it is totally waterproof & therefore VERY usable.
Here is a side on picture to show you the depth:
They came about thanks to an excellent book called Simply Sublime Bags by Jodi Kahn which I found whilst browsing in the library the other day. In the book Jodi had made a bag from wallpaper & that's what sparked me into making my own version using the Designer papers.
Here's the one I made for my lovely upliner Lisa (Lavender Stamper), this one has the same papers but using First Edition Specialty paper as the contrast papers.
I hope you all enjoy these & please do let me know what you think by leaving a comment.
Subscribe to:
Posts (Atom)